1. Home
  2. Hosting & Servers
  3. Windows Hosting
  4. How to change your Outlook POP3 settings to keep a copy of emails on the server
  1. Home
  2. Hosting & Servers
  3. Reseller Hosting
  4. How to change your Outlook POP3 settings to keep a copy of emails on the server
  1. Home
  2. Hosting & Servers
  3. Web Hosting
  4. How to change your Outlook POP3 settings to keep a copy of emails on the server
  1. Home
  2. Email & Collaboration
  3. Business Emails
  4. How to change your Outlook POP3 settings to keep a copy of emails on the server
  1. Home
  2. Email & Collaboration
  3. Microsoft 365
  4. How to change your Outlook POP3 settings to keep a copy of emails on the server
  1. Home
  2. Hosting & Servers
  3. Windows Hosting
  4. How to change your Outlook POP3 settings to keep a copy of emails on the server
  1. Home
  2. Hosting & Servers
  3. Reseller Hosting
  4. How to change your Outlook POP3 settings to keep a copy of emails on the server
  1. Home
  2. Hosting & Servers
  3. Web Hosting
  4. How to change your Outlook POP3 settings to keep a copy of emails on the server
  1. Home
  2. Email & Collaboration
  3. Business Emails
  4. How to change your Outlook POP3 settings to keep a copy of emails on the server
  1. Home
  2. Email & Collaboration
  3. Microsoft 365
  4. How to change your Outlook POP3 settings to keep a copy of emails on the server

How to change your Outlook POP3 settings to keep a copy of emails on the server

The POP3 account type creates a local copy of your emails on your computer and depending on the settings in Outlook, may delete the original message from the server.

If you would prefer to keep some of these emails on the server as a backup, you can change this setting in Outlook.
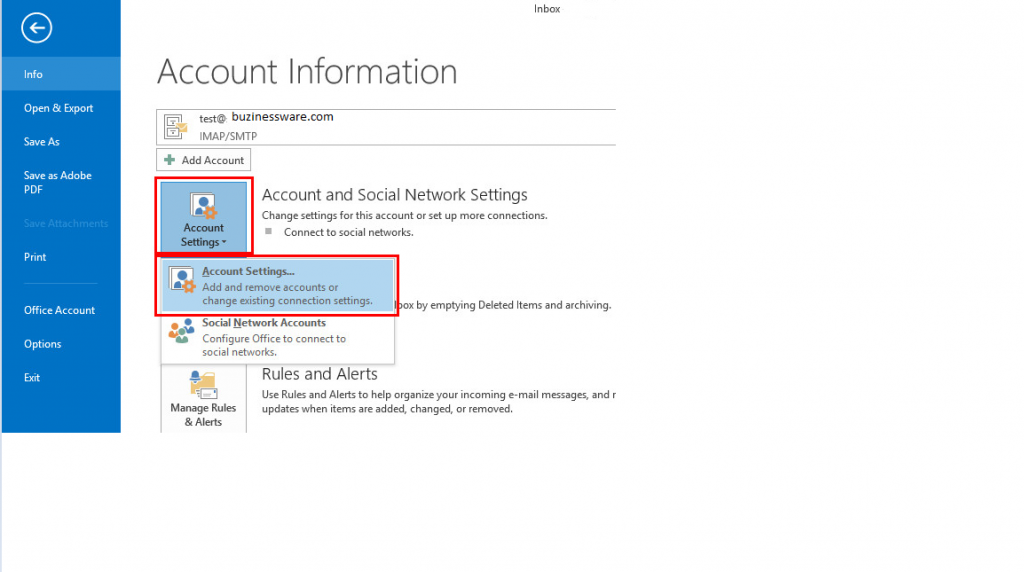
Step 1

Open up your Outlook program. Next, select the File Menu and then the Account Settings button.

(In older versions of Outlook, this can also be found under Tools then Account Settings).
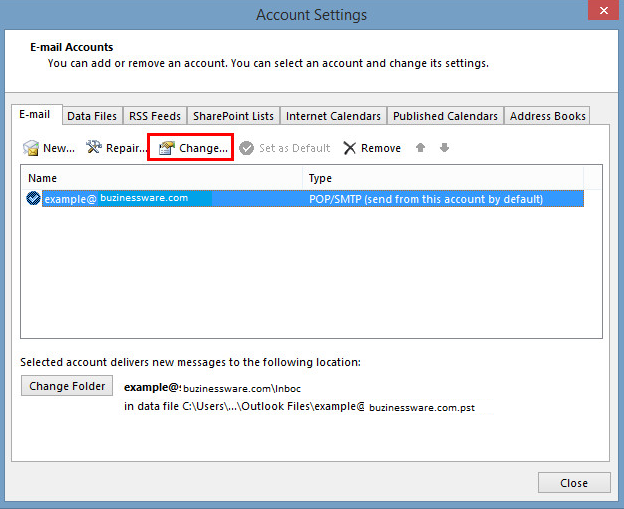
Step 2

Double click the email account in the list or click once and select the ‘Change’ button.
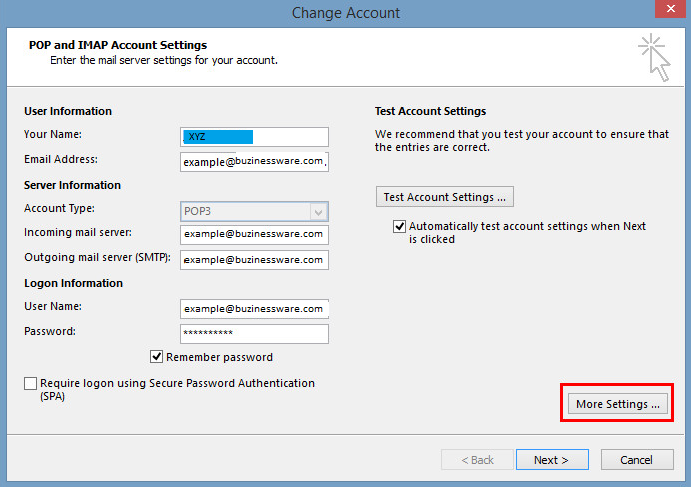
Step 3

A window will appear with your email account’s settings. Next, select the ‘More Settings’ button.

Step 4

Go across to the “Advanced” tab. Down the bottom is a Delivery section. Check the box “Leave a copy of messages on the server“. Below this you can also select to “Remove from the server after __ days“. If you only wish to keep the last 2 weeks on the server, type in 14. If you wish to leave all remaining emails on the server (unless you delete them) do not check this second box.

Then select OK to save this window and then Next on your account settings window.

Updated on November 28, 2022

Was this article helpful?