Use the following steps to configure email for iOS on an iPhone or iPad.
If you have cPanel hosting, make sure you have created an email account first.
1.Select the ‘Settings‘ button on the Home screen.
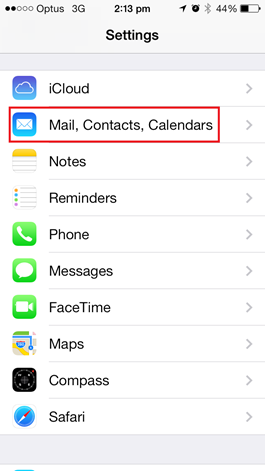
2. Click on ‘Mail, Contact, Calendars‘ in the Settings.
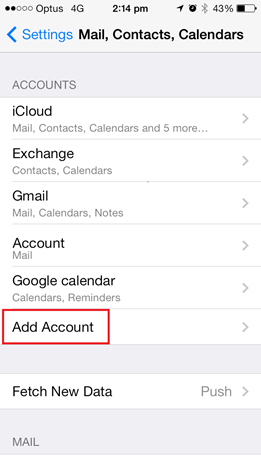
3. Click on ‘Add Account‘ in the Accounts section
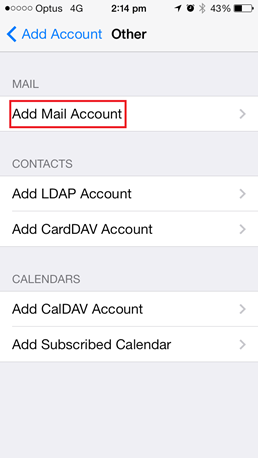
4. Choose ‘Other‘ as your email account type
5. Select ‘Add Mail Account‘ under the Mail section.
6. On the New Account page, enter the following details:
‘Name‘: Name of the account
‘Email‘: The email address for the account, eg. ‘[email protected]’
‘Password‘: Password for the email account.
‘Description‘: Textual description for the account
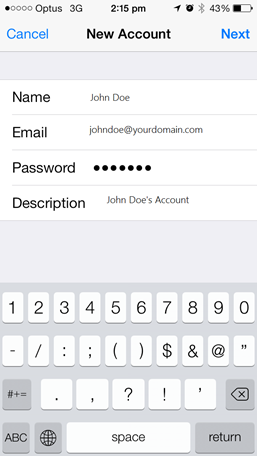
Then click ‘Next‘.
7.The device may attempt to retrieve the emails settings for the server. If it fails, continue with the following steps to configure the settings manually.
8. Both POP and IMAP are supported on Crucial servers. Select ‘POP‘ or ‘IMAP‘ depending on your preference.
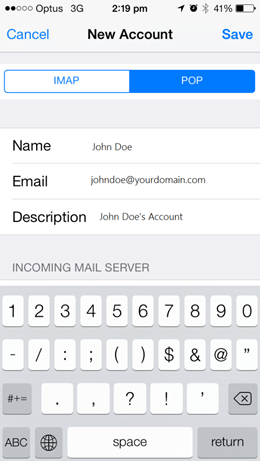
9.After selecting the type of mail account, scroll down and fill in the details for the ‘Incoming Mail Server‘ and ‘Outgoing Mail Server‘.
Incoming Mail Server
‘Host Name‘: mail.yourdomain.com
‘Username‘: Your full email address, eg. [email protected]
‘Password‘: The password to your email address
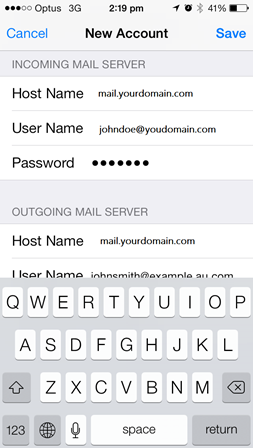
Outgoing Mail Server
‘Host Name‘: mail.yourdomain.com
‘Username‘: Your full email address, eg. [email protected]
‘Password‘: The password to your email address.
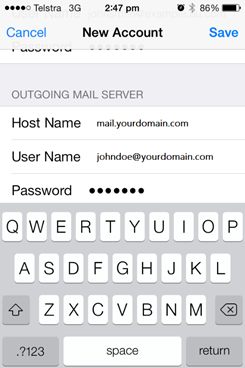
10. Tap on ‘Save‘
- The device will try to verify the details entered. This process can take a while.
If you are using a Self Signed SSL Certificate, you will get a warning saying, ‘Cannot Verify Server Identity‘, Click on ‘continue‘.
This completes the configuration of emails on your iPhone/iPad. You will now be able to send emails using your iPhone/iPad. You can verify this by sending an email to yourself.