There are a few things to note when making PHP changes. If you’re unfamiliar with this tool, check the notes at the bottom of this article.
This guide is for our Web Hosting and Reseller plans, as well as VPS and Dedicated Servers with CloudLinux. If you’re on a Blaze / Control Panel VPS
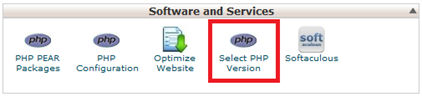
First thing to do is: log in to cPanel then click on Select PHP Version icon
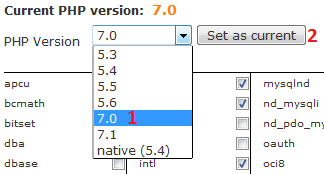
To change the PHP version: (1) Select a version other than native then (2) click Set as current. You will need to do this before you change other PHP settings and modules.
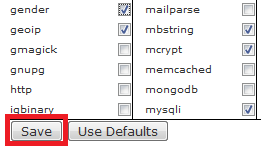
To enable a PHP module: Tick the box for the module you want to enable and click Save
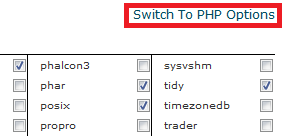
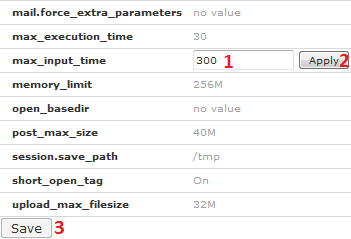
To change the PHP options such as max_input_time, post_max_size etc: First, click on the Switch to PHP Options link in the top right.
To edit a setting, (1) click on the value you want to edit and change it, (2) click Apply, (3) click Save down the bottom left of the screen
When you make some changes in this tool, there are a few important things to note:
Note 1: If you had a module or other setting enabled for a different PHP version, you will have to select the modules and enable them again as each version maintains its own list of active modules and other settings.
Note 2: Make sure to update PHP one version at a time. Newer PHP versions remove old functions which can break your site, so you will need to go back. Start by updating, for example, from 5.4 to 5.5. Go to your site, test all the pages, forms and functions to make sure everything works correctly. If it’s fine, go to 7.1 and test the site again. You can always go back to an earlier version of PHP so there’s no serious risk in switching versions.