If you need to check, test or access a new website that is only accessible on a temporary URL, you may need to edit the hosts file to properly test the website. This method of access can also be used to make changes to a staging website prior to the website going live, or to simply verify the outcome of a migration.
The location of the hosts file and how to edit this depends on the operating system you are using.
Further down this page, there are guides for Windows, Mac and Linux.
How the Hosts file works
This basically works by tricking your computer into thinking that the DNS records have been updated on your Computer only. This allows you to access the website normally, but have it load from a different server.
The hosts file itself needs to be updated with specific syntax, this will be in the format of ‘ip domain(s)’, for example.
127.0.0.1 yourdomain.com.au www.yourdomain.com.au
Make sure the IP at the start of the line is the one of your actual server. You would see this in the email you received with your cPanel or WHM login information.
Once the changes have been made, you can test the website on the new server using its normal domain name/URL ie. how you normally access the website.
Crucial recommends removing the changes made in the host file once the testing has been completed.
Windows
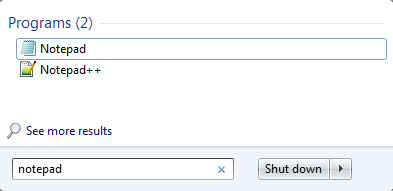
1.Locate ‘notepad‘ in the start menu
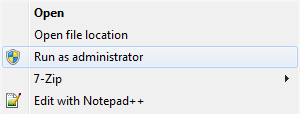
2. Right click on notepad and select ‘Run as Administrator‘
3. Click ‘File‘ and then ‘Open‘
4. Navigate to the following location: ‘C:\Windows\System32\drivers\etc‘
- First navigate to your C: drive
- Then navigate to the Windows folder
- Then find the System32 folder
- Then select drivers
- Then locate the etc folder
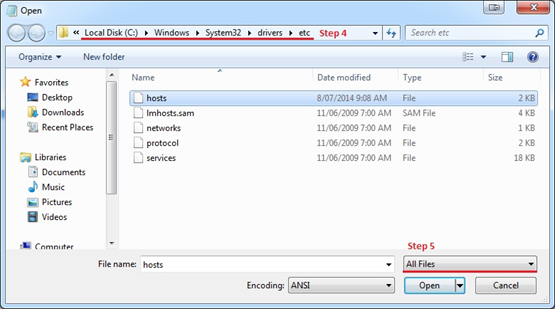
5. Change ‘Text Documents (*.txt)‘ to ‘All Files’
6. Select ‘hosts‘ and click ‘Open‘
7. Type in the details as required
Ensure that you use the details provided in the migration email for this section
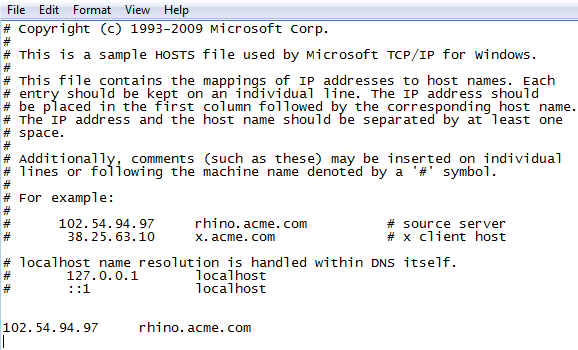
8. When done save the file by clicking on ‘File‘ and then ‘Save‘
Mac
1.Open Finder
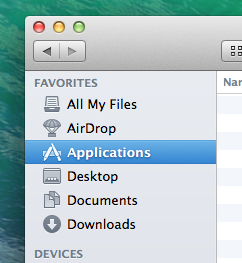
2.Select ‘Applications‘, and then ‘Utilities‘
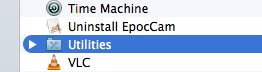
- You can also hold down the ‘Control‘ and ‘Shift‘ keys and press ‘U‘
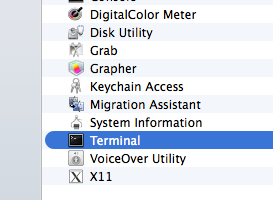
3. Open ‘terminal‘
4. Type in ‘sudo nano /private/etc/hosts‘
(If this file is blank use ‘sudo nano /etc/hosts‘)
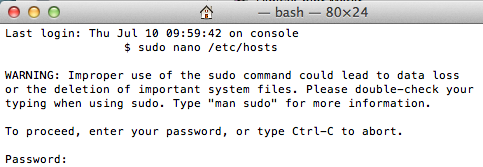
- 5.Type in your computer’s password and press ‘Enter‘
The screen will remain blank while doing this
Use the ‘down arrow‘ key to navigate to the end of the file
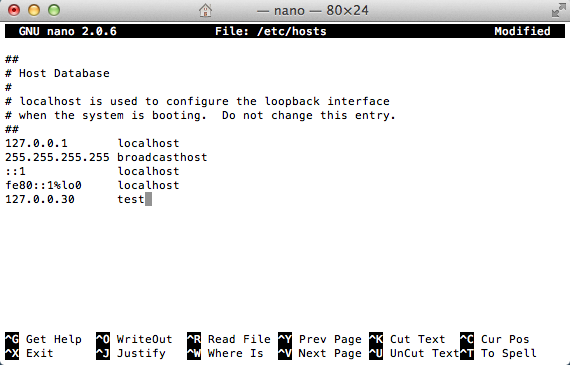
- 6.Type in the details as required
- 7.Hold down the ‘Control‘ key and press ‘O‘ to save, then press ‘Enter‘
- 8.Hold down the ‘Control‘ key and press ‘X‘ to exit nano
- 9.You can now exit terminal
Linux
- Open a teminal window
- Type in ‘sudo vi /etc/hosts‘
- Type in your computer’s password and press ‘Enter‘
The screen will remain blank while doing this - Use either the down arrow or ‘j‘ to navigate to the bottom of the file
- Press ‘i‘ to enter insert mode
- Type in the details as required
- When done press ‘Esc‘ to exit insert mode
- To close the file press either ‘Z‘ twice or type the following ‘:wq‘
- You can now exit terminal