Before installing SQL Server 2012 make sure you have the below components installed or enabled on your Windows server.
- Download and install .NET Framework 4.0. If the computer has Internet access, SQL Server setup will download it when needed.
- Enable .NET Framework 3.5 using Control Panel -> Programs and Features -> Turn on/off features
Now go through the next steps for the installation.
- Login to your Windows server with the administrator user.
- Down load the proper SQL server set up from the link http://www.microsoft.com/en-us/download/details.aspx?id=29062
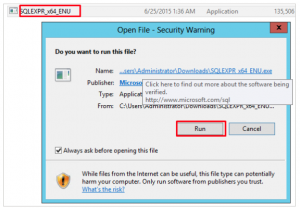
- Double click the installer file and then click on RUN
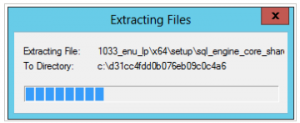
4.The set up file will start extracting the installation files
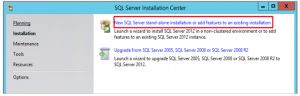
5.On the next screen choose the top option to install a new stand-alone installation and click on it.
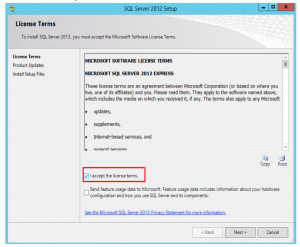
6.The set up will process the basic operations and you will see the licensing screen where you have to check the box for “I accept the license terms” click on next.
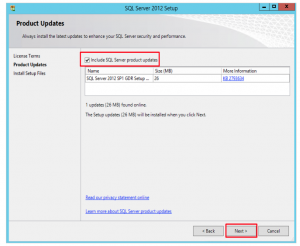
7.The next screen will be Product Updates. SQL server will check for and install any updates. Leave it as it is and click on next.
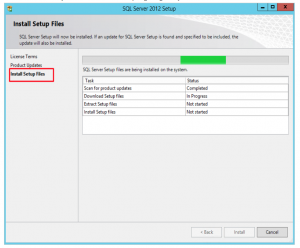
8.On The next screen you will see that the set up is getting ready for installations.
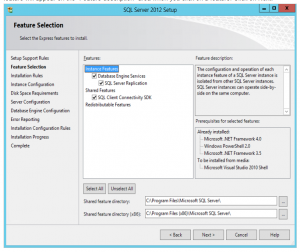
9.On the Feature Selection page, please select the features you would like to install. A description of each feature will appear on the “Feature description” area when you click on a feature. Click on Next.
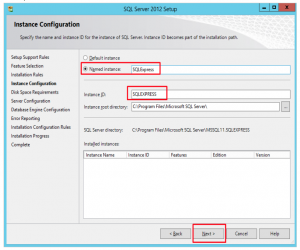
10.On the Instance Configuration page, choose a name for the instance or select a default instance. SQLExpress is the name of the instance as we have selected Named Instance. Click on Next.
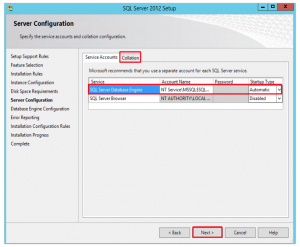
11.The next step is server configuration. From here you can change the Windows services associated with this instance of SQL Server. You can keep the defaults here unless you want to specify different user accounts for the services. You can also change the default collation settings if you are not in the United States. Click Next to continue.
12.The next step is Database Engine configuration. On the Server Configuration tab you can select whether SQL Server will only authenticate using Windows accounts or you can choose Mixed Mode which will allow Windows accounts and SQL accounts. Mixed mode authentication is generally used so we will select it. Provide the password for “sa” user and then click on next.

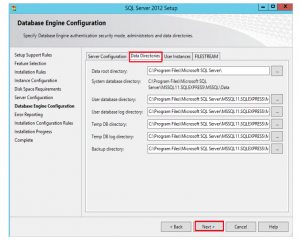
13.On the Data Directories tab you can change the locations of log files and other files that SQL will use. Depending on your server configuration and the load that will be put on SQL, you may want to put the database and log folders on separate drives. For most users, you can leave the default values. Click on next.
14.The next screen is of Error Reporting option. You can choose whether or not you would like to send error reports to Microsoft. Just click on next.
15.At this point, SQL server will install on your computer. This could take a while to complete depending on the computer you are using.

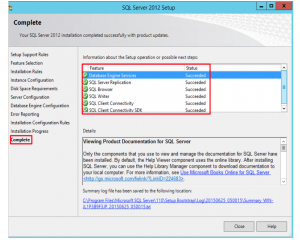
16.Once the installation has completed, you will receive a screen showing the details of what was completed and if there were any problems.