This article walks you through the process of setting up the Active Directory® role on a Microsoft® Windows Server® 2012 server. This article is intended for users who don’t have existing Active Directory forests. It does not cover how to configure a server to act as a domain controller for an existing Active Directory forest.
Install Active Directory
Use the following steps to install Active Directory on the server:
- Open the Server Manager from the task bar.
- From the Server Manager dashboard, select Add roles and features.
- The Roles and Features Wizard launches. This wizard enables you to make modifications to the Windows Server 2012 instance.
- On the Installation Type screen, select Role-based or features-based and click Next.
Note: Roles represent the major feature sets of the server, such as Internet Information Services (IIS). Features provide additional functionality for a given role. - By default, the current server is selected. Click Next.
- On the Server Roles screen, select the check box next to Active Directory Domain Services.
A notice displays that explains that you must also install additional roles, services, or features in order to install Domain Services. These additional capabilities include certificate services, federation services, lightweight directory services, and rights management.
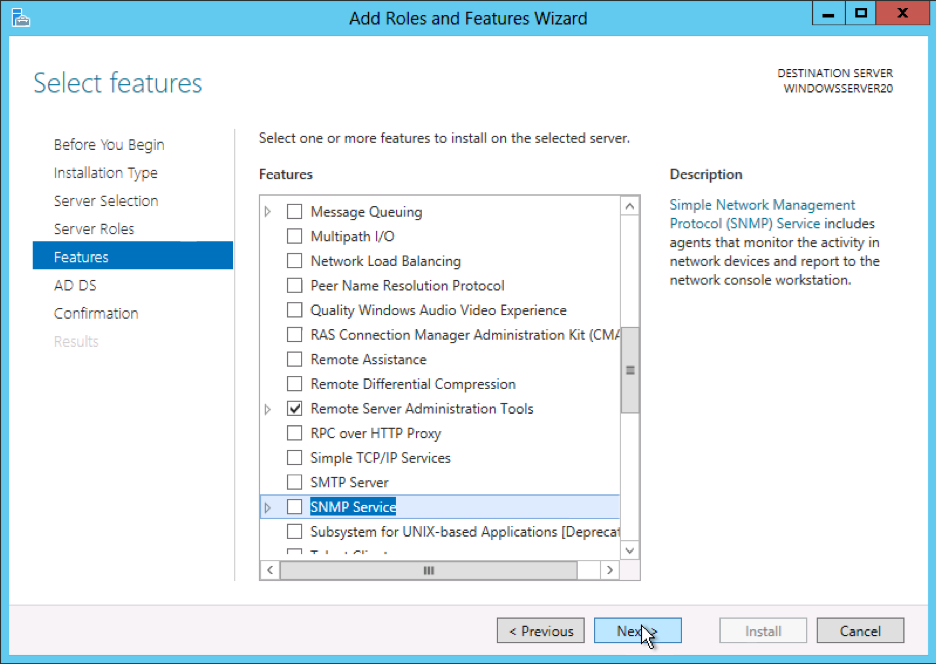
To select additional capabilities, click Add Features. - On the Select features screen, select the check boxes next to the features that you want to install during the AD DS installation process and click Next.
- Review the information on the AD DS tab, then click Next.
- Review the information on the Confirm installation selections screen, then click Install.
Note: Information on the progress of the installation displays. After the installation is complete, the AD DS role displays on the Server Manager landing page.
Start the remote registry serviceBefore you can promote the server to domain controller, you must start the remote registry service by using the following steps:
Start the remote registry service
Before you can promote the server to domain controller, you must start the remote registry service by using the following steps:
- Click Start > Control Panel.
- Under Services, right-click Remote Registry and open the Properties menu.
- From the Startup type: drop-down menu, select Automatic.
- Under Service Status, select Start
- The remote registry service starts.
Configure Active Directory
After you have installed the AD DS role, you must configure the server for your domain by using the following steps:
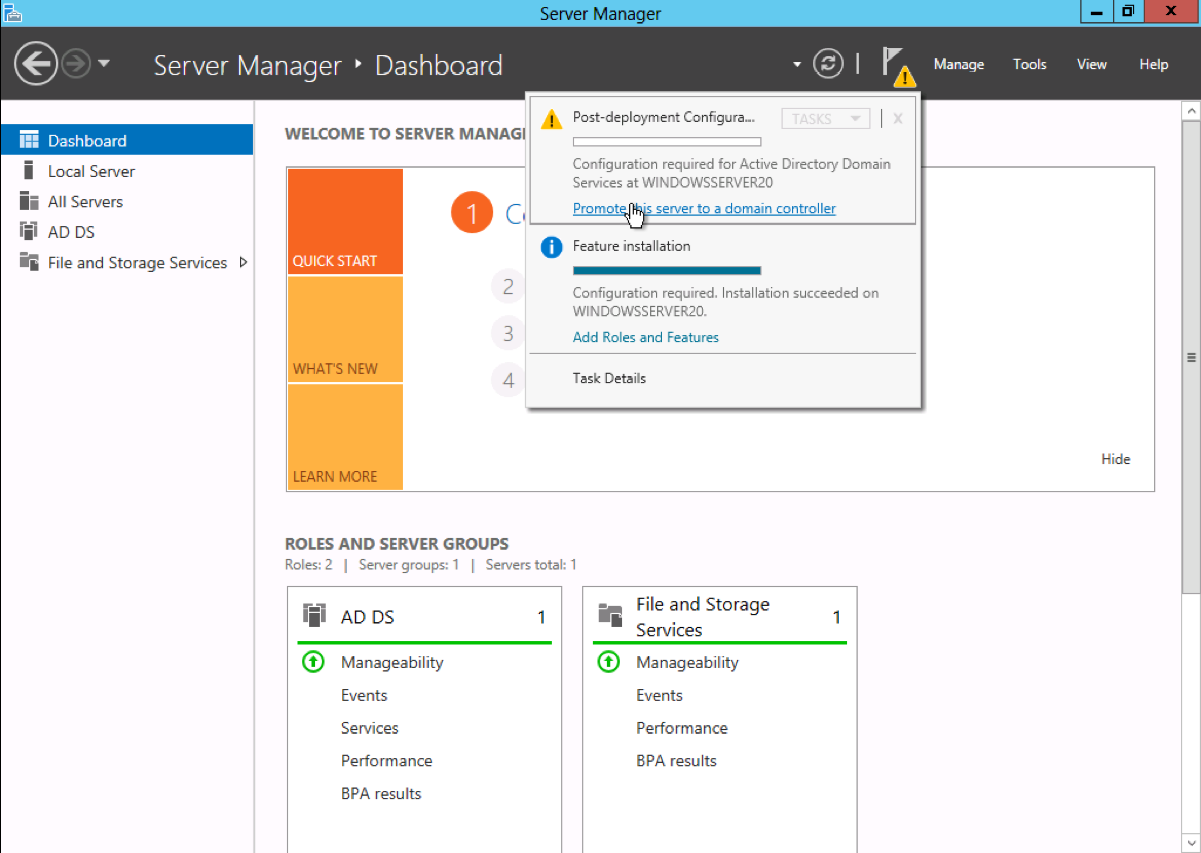
- From the task bar, click Open the Server Manager.
- Select the yellow notifications icon in the top navigation bar of the Server Manager window.
The Notifications Pane opens and displays a Post-deployment Configuration notification. Click the Promote this server to a domain controller link that appears in the notification.
- From the Deployment Configuration tab, select Radial options > Add a new forest. Enter your root domain name in the Root domain name field and click Next.
- Select a Domain and a Forest functional level.
- Review the warning on the DNS Options tab and select Next.
- Confirm or enter a NetBIOS name and click Next.
- Specify the locations of the Database, Log files, and SYSVOL folders, then click Next.
- Review the configuration options and click Next.
- The system checks if all of the necessary prerequisites are installed on the system. If the system passes these checks, click Install.
- After the server reboots, reconnect to it by using Microsoft Remote Desktop Protocol (RDP).