Install FileZilla
To get started, you first have to download the client version of FileZilla onto your computer.
URL: https://filezilla-project.org/
This link will take you to the recommended client installer for Windows. For most basic users, you can stick with the default options during installation.For Linux and Mac users, the above page also offers a link to download options appropriate to those platforms.
Connect to FTP Server with FileZilla
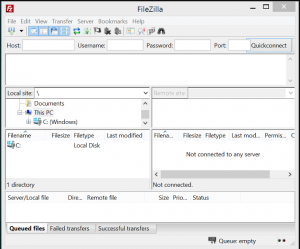
When you open the FileZilla client after installation, it will look similar to the image below.

To connect to an FTP server, enter the domain name or the server IP address where it says “Host”. Next, enter your username and password into the “Username” and “Password” fields. The port number will be 21 if you want to use regular old FTP, or you can use 22 if you want to use SFTP. SFTP is the secured version of FTP. Once you’ve entered all of this information, click the “Quickconnect” button to the right of the “Port” field.
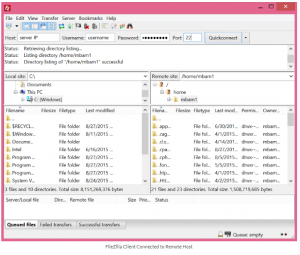
After FileZilla connects, your screen should look similar to the one shown in the image below.

On the left side of the screen, under “Local site”, you will see listings for the files and directories on your computer. On the right side of the screen, under “Remote site”, you will see the listings for the files and directories on the remote server you are connected to.
Transferring Files
To upload a file to the remote server, find the file under “Local site” on the left side of the screen (your computer). Once you’ve located it, drag it to the right side of the screen under “Remote site” and drop it into the folder or directory you want to upload to.
To download a file from the remote server to your computer, you will do the same as above except reversed. Find the file under “Remote site” and drag it to the “Local site” side and drop it int the folder you would like it to download to on your computer.
That’s not the only way to upload or download files with FileZilla. Another option is to double-click the file you want to upload or download. FileZilla will add the file to the transfer queue, and the transfer process will automatically begin.
To transfer directories or multiple files, select them (singly or as a group) and then right-click the selection. From the pop-up menu, select “Upload” or “Download”.
Saving Connections with FileZilla Site Manager
FileZilla Site Manager allows you to save connection settings, so you don’t have to re-enter your information every time you need to connect. This feature is very convenient if you need to connect to the same server(s) regularly.
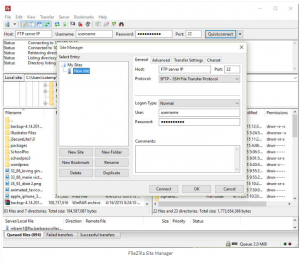
Once you have connected to the FTP server, go to the “File” menu and select “Copy current connection to Site Manager”. You can also manually add the information into Site Manager. Just click the file menu and select “Site Manager” or Crtl+S.

This connection’s name is highlighted. You may want to click on the “Rename” button change this connection’s name to something more meaningful than the default “New site”. You can also enter any further comments about this connection in the “Comments” box at the bottom right. If you chose the “Copy current connection to Site Manager” option, then your connection details will already be filled in. If not, you’ll need to manually enter Host, Port, Protocol, and User. When you’re done, click the “OK” button.