This demo assumes you’ve already logged in to cPanel
Now let’s learn how to create an addon domain
1) Click the Addon Domains icon
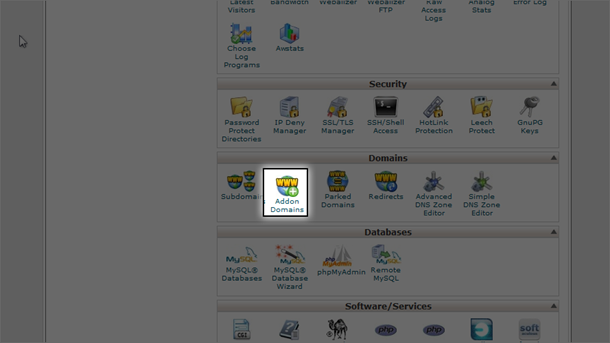
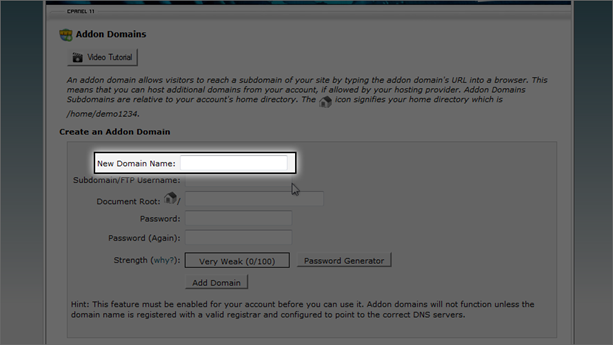
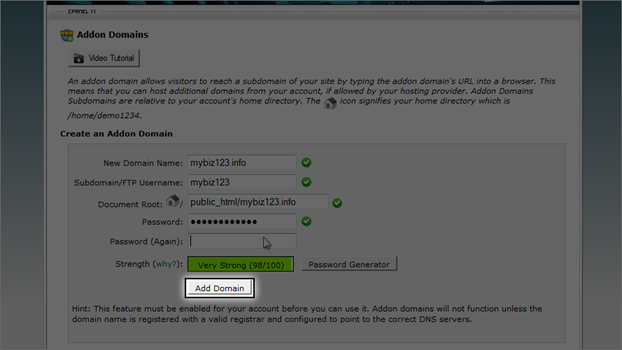
This is the Addon Domains page, where you can setup additional domain names that point to subdomains of your account
2) Enter the new domain name here…
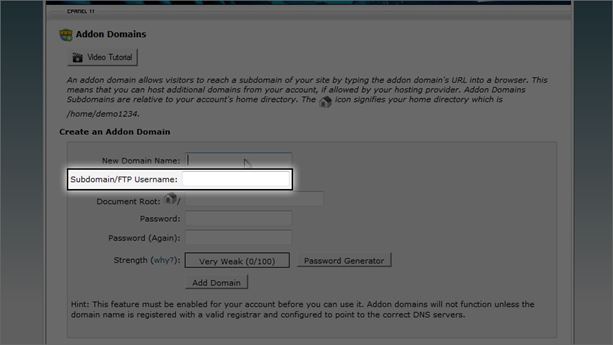
3) … then enter a unique username for the domain
4) Enter and confirm a password…
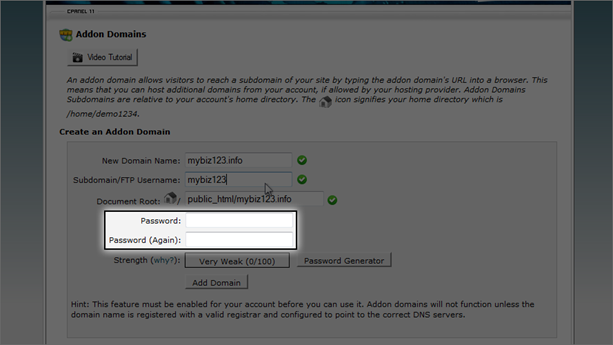
5) … then click Add Domain
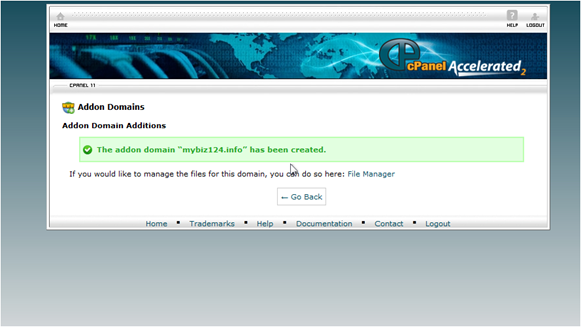
That’s it! The addon domain has been created
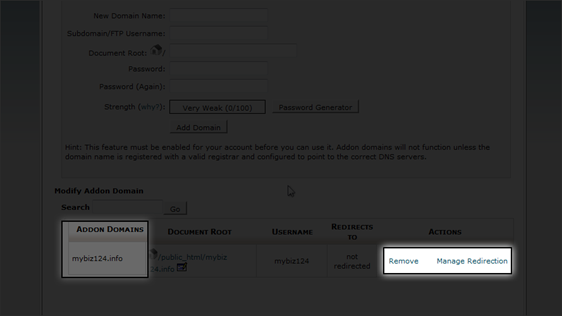
From here you can see a list of addon domains… … and you can manage or delete these addon domains from here
This is the end of the tutorial. You now know how to create addon domains in cPanel.