In order to install the Let’s Encrypt AutoSSL provider plugin you will simply log in to the server as the root user via SSH and execute the following command:
# /scripts/install_lets_encrypt_autossl_provider
Running this will add and install the necessary RPM files in order to support Let’s Encrypt as an AutoSSL provider. The command should yield results similar to the following:
Enable Domains With AutoSSL
Once you login to WHM for your server.
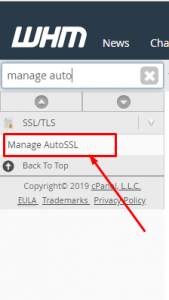
- Search for “Manage AutoSSL” in the upper left-hand search box.
- Click the “Manage AutoSSL” option from the dropdown list.
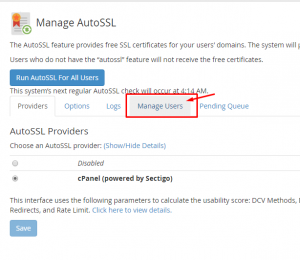
3.Next select the AutoSSL provider you want to use, for this example we will choose cPanel (Powered by Comodo). If you are interested in a faster process you can run the above steps but with Let’s Encrypt instead of cPanel (Powered by Comodo), which completes in minutes rather than hours.
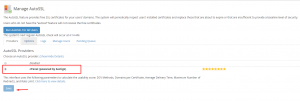
4.Then hit “Save” at the bottom of the page.
5. Select the “Manage Users” tab at near the top of the page.
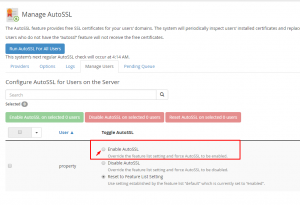
6.Select “Enable AutoSSL” to secure your domain(s) with AutoSSL.
7.Click “Check (your domain)” for SSLs on each domain/s.
You have now successfully enabled and run AutoSSL for your selected domain/s. The process of receiving the SSL can take some time, from a few hours to two days. Once received, AutoSSL fully automates the installation of the SSL.