1 – How to access the WHM Firewall
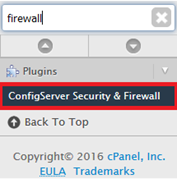
To access the firewall log into WHM, type firewall in the search bar and click on ConfigServer Security & Firewall
2 – How to unblock IP’s in the firewall
NOTE: If your IP is blocked, note down your IP (you can find it using whatismyip.com) then tether your phone’s internet connection to your computer (your ISP should be able to assist with doing this). You’ll now have an unblocked IP address that you can use to log into your server and unblock your main IP.
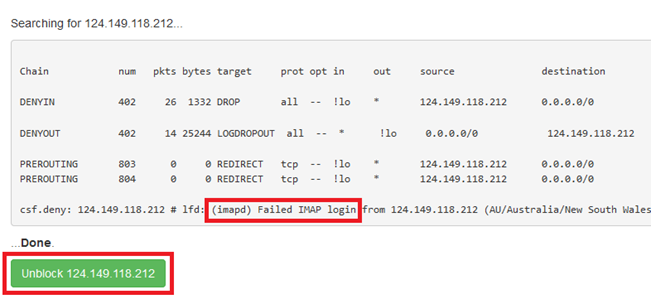
2A – Find the Search for IP section, input the blocked IP address and hit Enter or click on the Search for IP button

2B – If the IP is blocked you’ll see this screen. Take note of the reason for the block. Click the green Unblock button to unblock the IP
2C – Once the IP is blocked you will see this screen
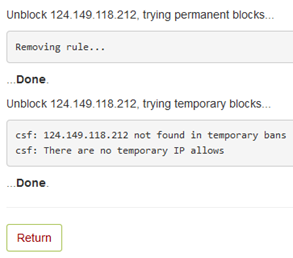
Note that this doesn’t stop the IP from being blocked again. To find the exact reason for the block you will need to SSH into the server as root and run the corresponding commands:
Failed IMAP/POP login: zgrep ip /var/log/maillog* | grep fail
Failed SMTP login: zgrep ip /var/log/exim_mainlog* | grep fail
Failed cPanel login: zgrep ip /usr/local/cpanel/logs/access_log* | grep fail
Failed FTP login: zgrep ip /var/log/messages* | grep fail
Failed SSH login: zgrep ip /var/log/messages* | grep fail
3 – How to Whitelist or Blacklist IP addresses
WARNING: You should only ever whitelist an IP address if you have confirmed
with your ISP that the IP is static and won’t ever be given to any device other
than your home/office router. Even then, someone accessing your local network
unauthorized or a visitor/employee with access to your network will have
unrestricted access to hack your server while connected to the network. If
you’re experiencing constant IP blocks due to failed passwords, we recommend
setting a temporary IP whitelist for a few hours. Unless you have very specific
technical requirements there’s never a good reason to permanently whitelist an
IP.
To temporarily whitelist/blacklist an IP look for the Temporary Allow/Deny option, select either allow or deny, input the IP address, select the ports (you can use * for all ports, type one port or multiple separated by commas, for example, 25,465,587), select the length you want and either press Enter or hit the Temporary Allow/Deny button.

To whitelist an IP address on your server you will need to first input it in the Quick Allow section and hit Enter or the Quick Allow button. Once that’s done do the same in the Quick Ignore section.
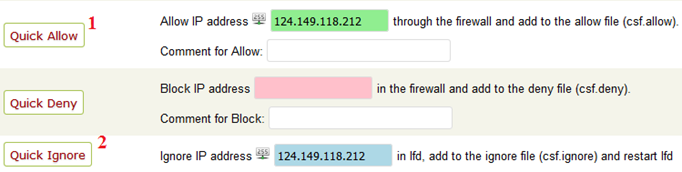
To blacklist an IP address, add the IP in the Quick Deny section then either click Enter or the Quick Deny button

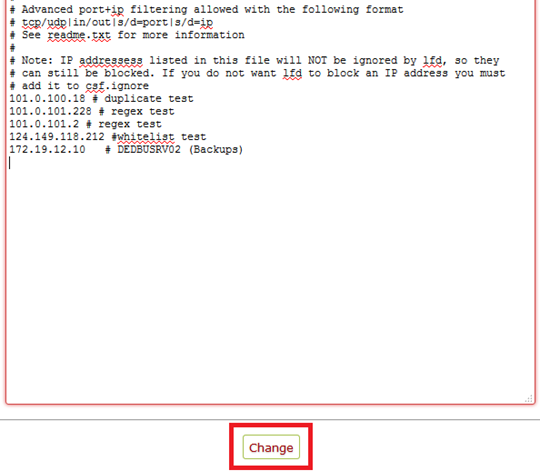
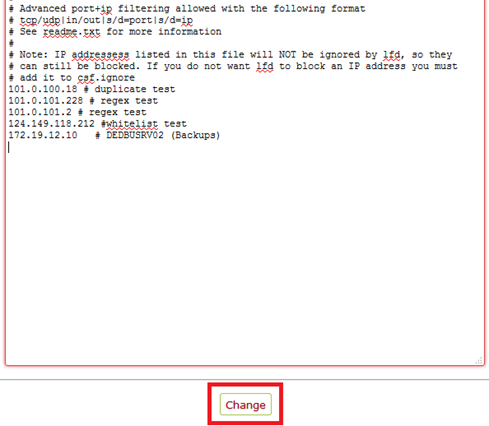
To remove a whitelist, first click the Firewall Allow IPs button. To remove a backlist, click the Firewall Deny IP’s button.

You will see a screen like the one bellow. Delete the whole line where the IP is listed and Change down the bottom.
4 – How to Block Ports
If your server is not used for email, if SSH access isn’t used or if you only want secure SSL connections used for email, you can block specific ports on your server by removing them from the default whitelist.
First, click on the Firewall Configuration button

Next, search for the TCP_IN and TCP_OUT functions. Just remove the port number from here.

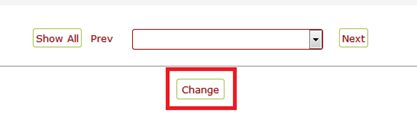
Once that’s done, scroll down to the bottom of the page (it’s long, so you may want to drag down from the sidebar) and hit Change
Wikipedia has a guide that lists ports and their standard uses: https://en.wikipedia.org/wiki/List_of_TCP_and_UDP_port_numbers
5 – How to Blacklist or Whitelist countries from accessing your server completely
Before you start, note that IP address lists are large enough that using this option can potentially cause your server speed to drop, so keep a note of it for a week or 2 after making the change. It will also prevent any email or web traffic from countries not Whitelisted. The upside, of course, is that this has a significant positive effect on your server security. One more thing, the country IP lists are about 99% correct, meaning it’s 1% incorrect, so this may be an area you should look into should a client be unable to access your server.
You can also apply blocks on a per cPanel account basis.
First, click on the Firewall Configuration button.

Next, find the CC_ALLOW_FILTER option. This creates a whitelist of countries which can access your server. Just above that is a CC_DENY option which can be used to create a blacklist. We don’t recommend using the CC_ALLOW option as it’s less secure than _FILTER

Once that’s done, scroll down to the bottom of the page (it’s long, so you may want to drag down from the sidebar) and hit Change.