1. Preliminary Note :-
Using CentOS 7 in the 64bit version. Same steps will work on CentOS 6 as well.
2. SFTP Installation :-
Run:
# rpm -qa|grep ssh
[root@localhost ~]# rpm -qa|grep ssh
libssh2-1.4.3-10.el7_2.1.x86_64
openssh-7.4p1-13.el7_4.x86_64
openssh-server-7.4p1-13.el7_4.x86_64
openssh-clients-7.4p1-13.el7_4.x86_64
3.- SFTP Configuration
Need to create a group and user so that we can manage all user that shall get SFTP access. But first, we have to create an additional folder called data.
# mkdir -p /data/sftp
# chmod 701 /data
create a group for the SFTP user
# groupadd sftpusers
Then create a user ‘howtoforge’ and assign it to the SFTPUSERS group.
# useradd -g sftpusers -d /upload -s /sbin/nologin mysftpuser
# passwd mysftpuser
Changing password for user mysftpuser.
New password:
Retype new password:
passwd: all authentication tokens updated successfully.
Explanation of the above commands:
- I create a user and include the user into sftpusers group using -g command.
- I assign the main directory for the user to be in the /upload directory by setting the -d /upload command. This means that later the /upload folder will be under /data/mysftpuser/upload.
- I limit the access to the /sbin/nologin shell to ensure the user is only able to use the SFTP protocol, not SSH.
- I name the user “mysftpuser”.
- Set password for user “mysftpuser”.
need to create the /upload folder under /data/mysftpuser, then assign appropriate ownership to the folder.
# mkdir -p /data/mysftpuser/upload
# chown -R root:sftpusers /data/mysftpuser
# chown -R mysftpuser:sftpusers /data/mysftpuser/upload
Verify the directory /data exists and that we made the configuration correct.
[root@localhost ~]# ls -ld /data/
drwx—–x. 5 root root 54 Mar 22 14:29 /data/
[root@localhost ~]# ls -ld /data/mysftpuser
drwxr-xr-x. 3 root sftpusers 20 Mar 22 14:29 /data/mysftpuser
[root@localhost ~]# ls -ld /data/mysftpuser/upload
drwxr-xr-x. 2 mysftpuser sftpusers 6 Mar 22 14:29 /data/mysftpuser/upload
[root@localhost ~]# cat /etc/passwd|grep mysftpuser
mysftpuser:x:1001:1001::/upload:/sbin/nologin
Now configure the SSH protocol to create an SFTP process. This can be done by editing the configuration file under /etc/ssh/sshd_config.
Below are the steps:
# nano /etc/ssh/sshd_config
Add the following lines at the end of the file.
Match Group sftpusers
ChrootDirectory /data/%u
ForceCommand internal-sftp
Once done restart the SSH services, below are the steps:
# service sshd status
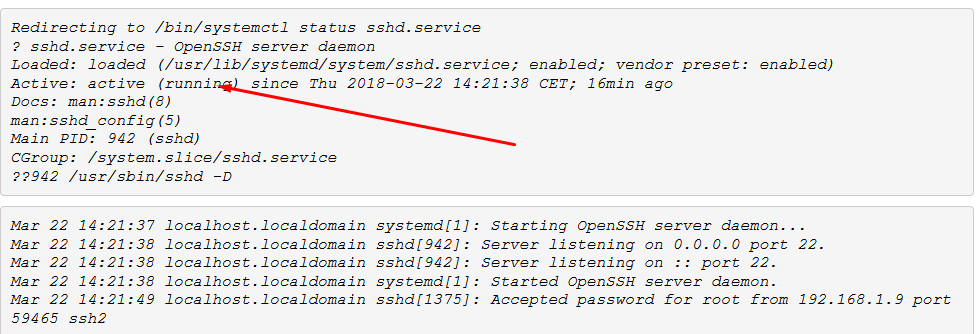
service sshd restart
4. Testing SFTP: –
If your client server didn’t have it you may download and install it with yum as shown below:
yum list nmap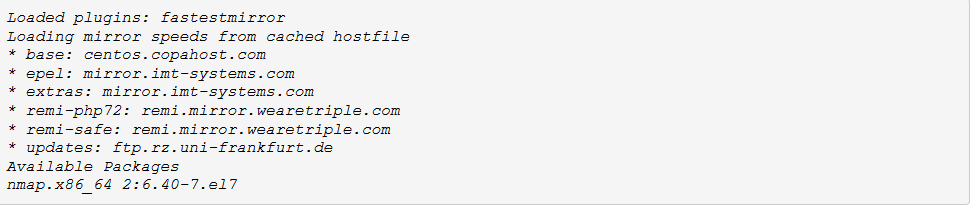
# yum install nmap -y
You’ll notice that currently on our SFTP server, the only open port is SSH 22. Now, let’s try to access the SFTP server (IP: 192.168.1.100 in my case) from TEST01 client.
[root@TEST01 /] # sftp [email protected]

Now let’s try to get a file from the SFTP server directory into our testing client. First, let’s create a test file under /data/mysftpuser/upload.
# cd /data/mysftpuser/upload
# touch testing_file.txt
Then go back to our testing site TEST01 and see if we able to get and download the created file.
[root@TEST01 /]# sftp [email protected]
[email protected]’s password:
Connected to 192.168.1.100.
sftp> pwd
Remote working directory: /upload
sftp> ls
testing_file.txt
sftp> get testing_file.txt
Fetching /upload/testing_file.txt to testing_file.txt
sftp> quit
Excellent! Our SFTP test has been successful, let’s try to access SSH using the user mysftpuser. As previously, we’ve set configuration as /sbin/nologin, therefore the user won’t be able to use SSH services:
[root@TEST01 ~]# ssh [email protected]
[email protected]’s password:
This service allows sftp connections only.
Connection to 192.168.1.100 closed.
Now we have a secured SFTP server up and running.