Enable WordPress debug mode to display errors
WordPress has a specific debug system and standardized code across the core, plugins, and themes to simplify the process of identifying PHP errors. Enabling this debug mode will cause all PHP errors and warnings to display, so you can find out what’s wrong with your site.
- Connect with an FTP client or use a file manager to edit the wp-config.php for your website.
- Change WP_DEBUG from false to true:
define( ‘WP_DEBUG’, false );
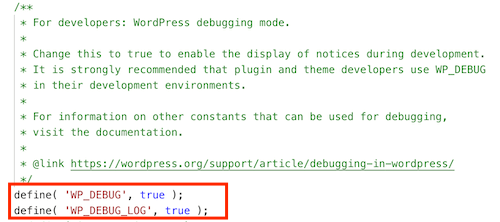
With debugging enabled:
define( ‘WP_DEBUG’, true ); - On the following line, type:
define( ‘WP_DEBUG_LOG’, true );
enable debug mode
- Once you’re done making changes, save the file. If you’re using FileZilla, accept the overwrite warning in FileZilla to replace the file.
- Use your internet browser to visit your site, this will allow the debug log to save errors.
- Using the same editor, open the file that was created by step 5, the /wp-content/debug.log file.
- Review the contents of the debug log to identify the problem to a specific plugin, theme, or configuration option that might be causing a problem.