The Remote Desktop Connection (RDC) feature of Windows allows you to remotely view and control remote Windows desktops. Sharing resources between your local and remote PC can be tricky, but it is possible to share your local files and folders over a remote desktop session using RDC or other remote desktop tools like TightVNC.
If you’re using RDC and want to access the files and folders on your PC when you’re connected, you’ll need to configure your RDC setup. You can set this every time you connect or, alternatively, create a Remote Desktop Protocol (RDP) shortcut file to save your settings.
The Remote Desktop Connection tool uses Microsoft’s Remote Desktop Protocol to create a remote desktop session to Windows PCs and servers. It’s included with all editions of Windows 10 and Windows Server.
Microsoft also offers RDP-capable software to allow you to connect to Windows PCs on Mac, as well as on mobile platforms like Android and iOS. If you’re on a Mac, you can share your Mac files and folders to Windows in the Redirection tab of the Remote Desktop app.
On Windows, the built-in Remote Desktop Connection tool allows you to configure your file and folder sharing settings before you connect.
- To start, open the Remote Desktop Connection tool. You can find this in your Windows Start menu under the Windows Accessories folder, or by clicking Win + R to open the Windows Run dialog box, then typing mstsc and clicking OK to open it.

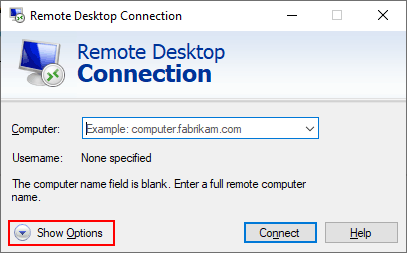
The Remote Desktop Connection tool, when first launched, is pretty basic. Normally, you would insert the IP address for your remote PC and click connect, but you’ll need to configure things further before you connect if you want to access your local files and folders.
- In the Remote Desktop Connection window, click Show Options.
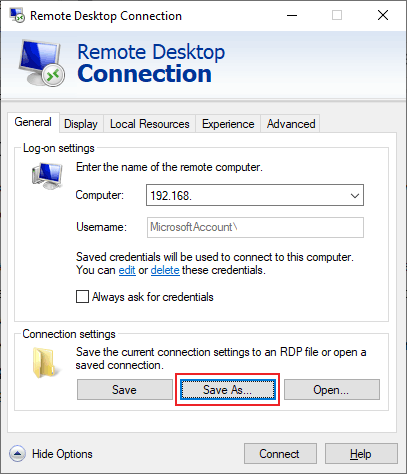
- Check all of your connection settings are correct, then under the Connection settings section of the General tab, click Save As.
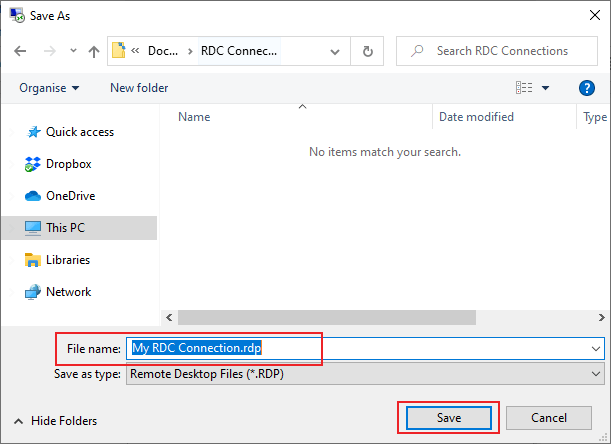
- In the save file box that appears, give your connection file a suitable name, then click Save.
Once your RDP file is saved, you can then use it to directly connect to your remote desktop in future. Double-clicking on the file to open it will launch the RDC tool and automatically connect with your predetermined settings applied.
You can also access the file from within the Remote Desktop Connection tool by clicking Open under the Connection settings section. If, at any point, you wish to change these settings, then follow the instructions above to overwrite the saved RDP file.
Sharing Files & Folders Over VNC
While Windows comes with the RDC tool, you can use other, third-party remote desktop connection software to connect to Windows and other operating systems. VNC is one of the more popular alternative protocols to RDP, with various connection clients you can use.
One of the most popular VNC server-client software combinations is RealVNC, but this only supports file transfers with a professional or enterprise subscription. A good, free alternative for Windows users is TightVNC, which does allow for file transfers.You’ll need a VNC server installed on your remote desktop to be able to do this. Installing TightVNC generally installs both the server and the viewer components, unless you customize this during the setup process.
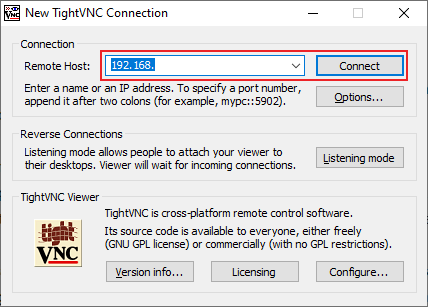
- If your remote VNC server is set up, download and install TightVNC on your local PC. Once installed, open the TightVNC Viewer and connect to your remote desktop by typing your IP address into the Remote Host box, then clicking Connect.
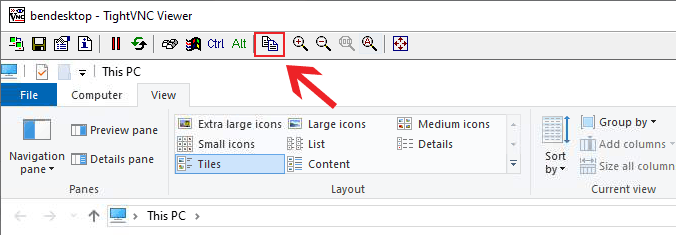
- Once connected, click the Transfer files icon in your TightVNC menu bar.
- In the TightVNC File Transfer window, select the files and folders you want to move from A to B (from your local PC to your remote PC, or vice versa). Click the >> or << buttons to begin the transfer. Click Yes to confirm that you want the transfer to begin.
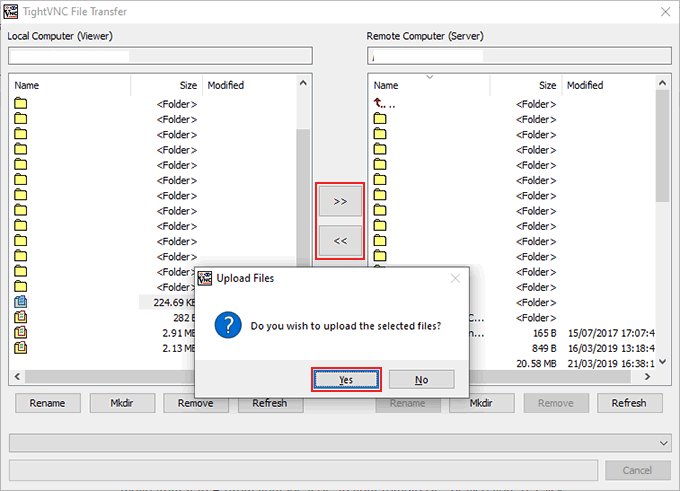
Once you agree to begin the transfer, the files and folders you’ve selected will begin copying across. If you want to cancel the transfer, click the Cancel button at the bottom of the window.
If you’d rather use another client, you can use file transfer software like WinSCP to move files between your local and remote Windows PCs instead.