You can easily personalize emails with any contact attributes that you store in your SendinBlue contact list. Personalization may be applied to your:
- email subject line
- sender “from” name
- the body of your email
Before getting started
Consider what details you will want to use to personalize your emails.
Basic attributes for first name, last name, email address, and SMS (phone number) are automatically created for you and the fields remain blank for each contact until you add this data.
Inserting personalization in your email
When designing your email, you will insert a placeholder that will be automatically replaced by the personalized information for each recipient at the time your email is sent.
The placeholder for a contact attribute is formatted like this:
{{ contact.ATTRIBUTE }}
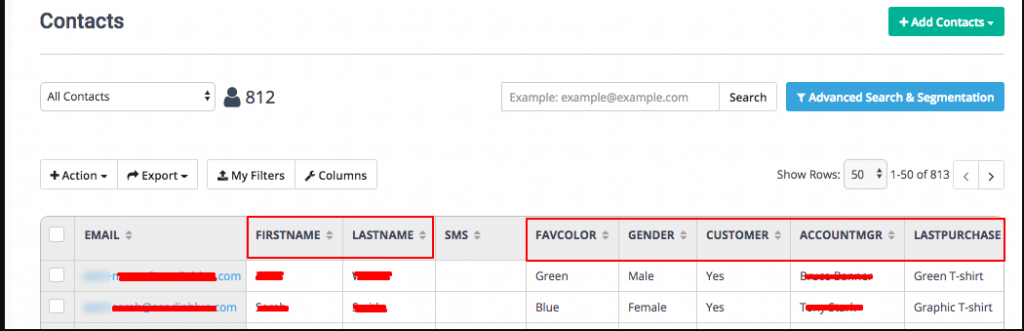
All placeholders will contain {{ contact. }} and you should replace the word ATTRIBUTE with the name of your Sendin Blue contact attribute EXACTLY as it appears on your Contacts page in Sendin Blue.

To insert our contact’s first name, we would insert the placeholder:
{{ contact.FIRSTNAME }}
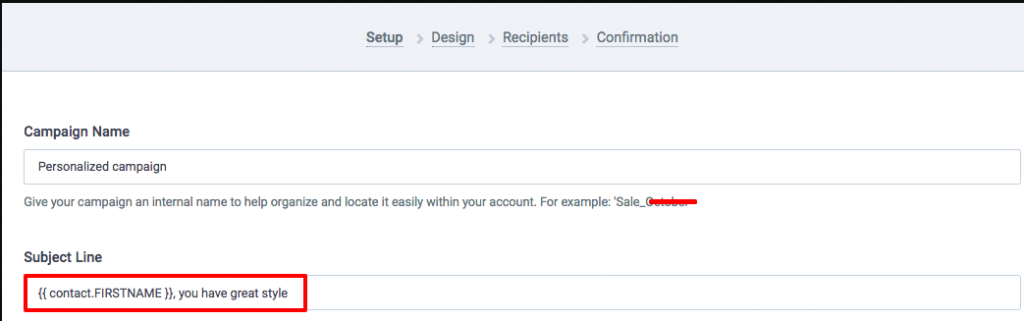
1. Personalizing your email subject line
You may manually type your contact attribute placeholders in your subject line, like this example.
If the email is sent to the contact on our list, [email protected], whose attribute for FIRSTNAME is Jatt, then the email subject will appear like this in his inbox:
![]()
2. Personalizing your email “from” name
The email “from” name is also defined in the Setup step and is designed to help your recipient quickly recognize you as the sender.

When the email is sent to our sample contact, [email protected], whose attribute for ACCOUNTMGR is Bruce Banner, then the email will appear like this in his inbox:
![]()
3. Personalizing your email content –
We recommend creating your emails in the Drag & Drop Editor in the Design step of campaign creation. In addition to automatically making your emails responsive (adaptive to any screen size), your emails may be personalized with contact attributes in two clicks!

Now, it’s easy to personalize your email in just a moment:
Inserting personalization in the Rich Text or Paste Your Code editors
If you prefer to create your emails in the Rich Text or Paste Your Code editors, you may manually add personalization as described above.
Testing your email personalization
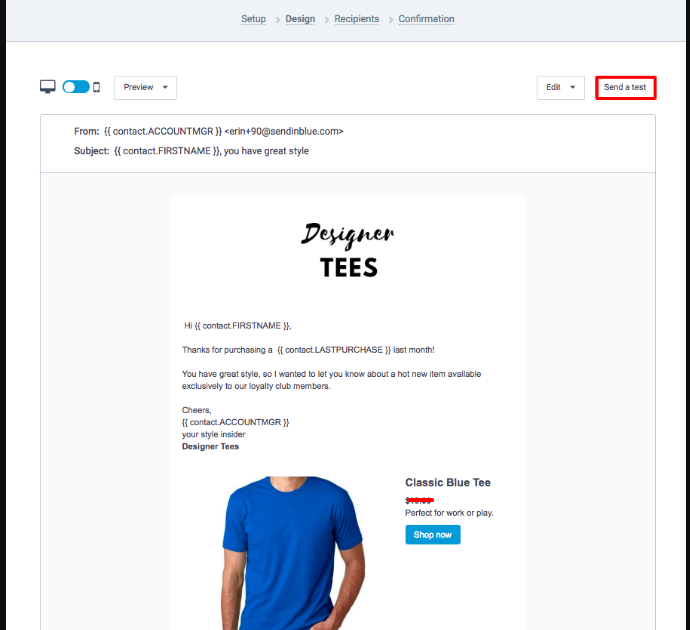
On the Confirmation step screen, you may review all contact attribute placeholders added to your email, including those in the “from” name and subject.
You can test your email personalization by clicking on Send a test.
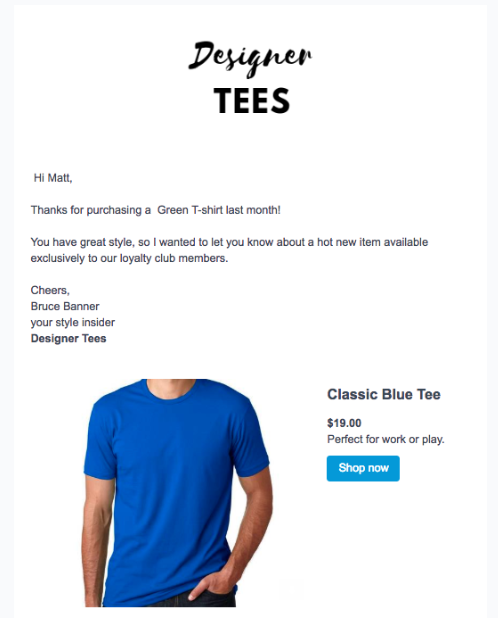
In the received test, our sample contact received this perfectly personalized email!