Step-by-step instructions for installing a wildcard SSL certificate on Microsoft IIS version 7 or 8
Wildcard certificates allow securing multiple subdomains with a single certificate. Microsoft IIS is one of the most popular server types our customers use, so we’ve compiled instructions on how to install a Wildcard SSL certificate on Microsoft IIS 7 / IIS 8 servers running .NET 2.0 or higher.
Phase 1 – Getting your Certificate Ready
You’re going to need to start by getting your SSL certificate ready to install. Comodo will email you your certificate once it’s issued. You’ll need the certificate to be in PKCS#7 format. You may need to use our certificate converter tool if it’s not.
Phase 2 – Install your Wildcard SSL Certificate on IIS 7 or 8

- Go to Start > Administrative Tools > Internet Information Services (IIS) Manager
- In the left menu, select the corresponding server name
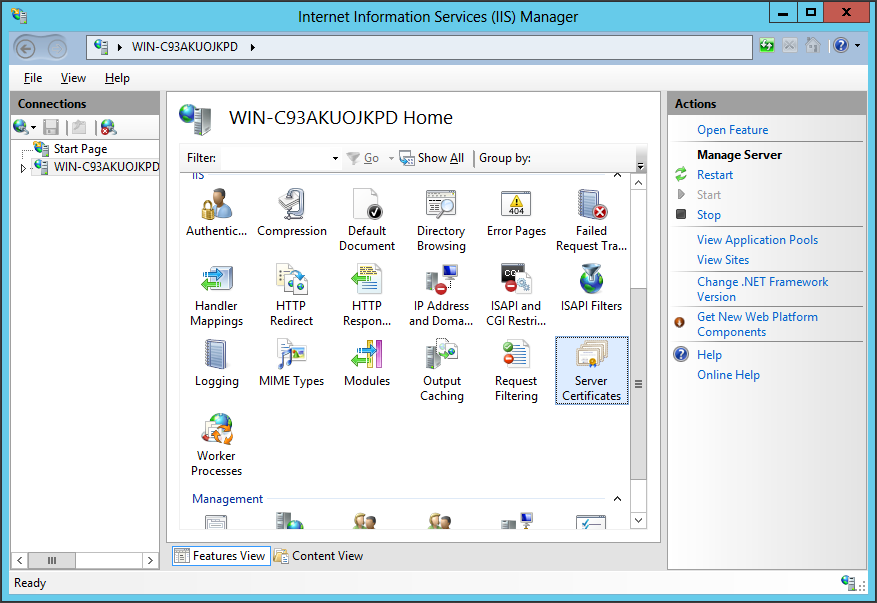
- In the Features Pane, under Security, select Server Certificates
- In the Actions Pane, choose Complete Certificate Request
- Provide the location of the certificate
Note: Make sure that the name you give your Wildcard SSL Certificate (aka the friendly name) includes an asterisk at the sub-domain level you’re attempting to encrypt (eg *.example.com). Otherwise, you will not be able to bind the certificate properly.
Phase 3 – Binding the Certificate

- Start > Administrative Tools > Internet Information Services (IIS) Manager
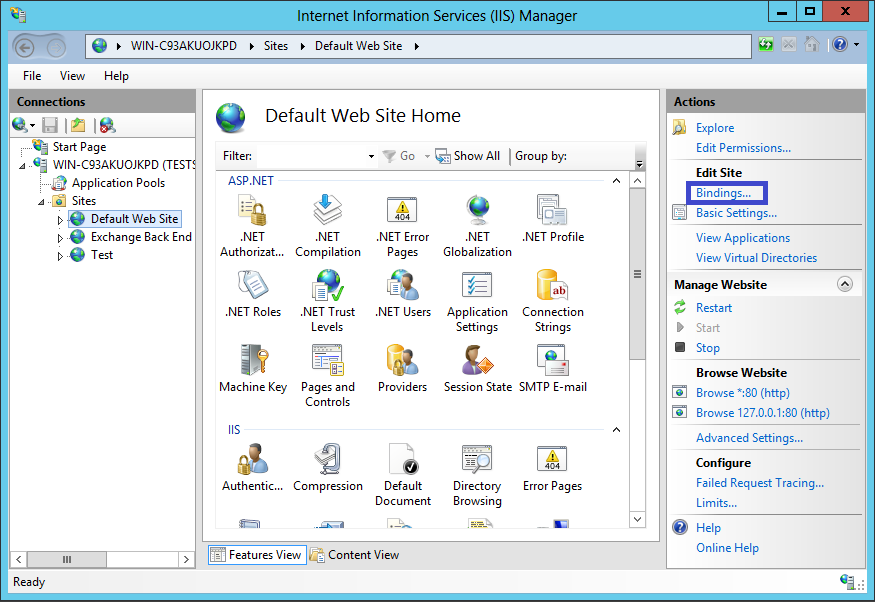
- Go to Server Name > Sites > Your SSL-based site
- In the Actions Pane, choose Bindings
- In Site Bindings, if there is no existing https binding, choose Add and change type to HTTPS
Note: if there is already a https binding, select it and click Edit.
From the SSL Certificate drop down, choose the wildcard certificate that will be used for this site.
And you’re done! Your wildcard certificate is now installed in IIS!